Some people are worth 'DIY-ing' for
December 3, 2015
If you’re like me, you love receiving presents just as much as giving them to your loved ones.
It may be hard to find the perfect gift that won’t empty your wallet — maybe it isn’t a matter of finding it, but a matter of making it.
Here are some DIYs that even the most artistically-challenged person will be able to pull of, all while saving enough money to buy yourself something too.
“Spread some love”
Get The Daily Illini in your inbox!
Difficulty level: Easy
Items needed:
Jar of Nutella
Spoon
Ribbon
Paper
Picture
1. Cover the Nutella label by cutting and taping a piece of paper over it. ?2. Cut the picture into a square and tape it onto the jar.
3. Write “Spread some love” underneath the picture.
4. Tie the piece of ribbon into a bow on the neck of the jar.
5. Tuck the spoon into the ribbon You may need to tape it to hold it in place.
(Adapted from seventeen.com)
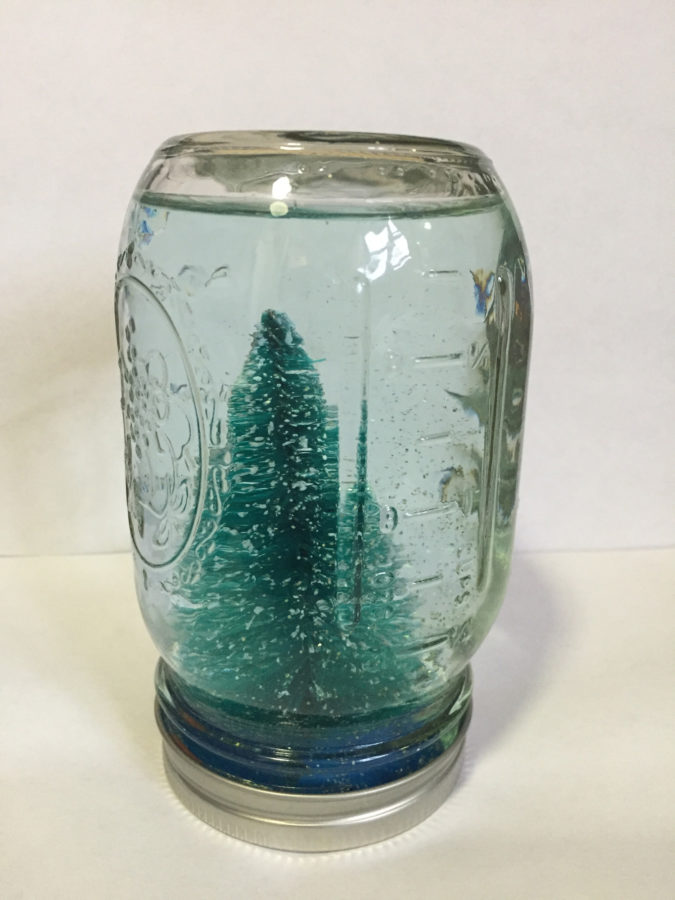
Mason jar snow globe
Difficulty level: Medium
Items needed:
Mason jar
Plastic tree or other figurine
Hot glue gun
Glitter
Glycerin (can be found at drugstores)
1. Glue the plastic tree or other object onto the inside of the Mason jar lid and let dry.
2. Fill the jar with water and add in glitter along with a few drops of glycerin.
3. Glue the lid onto the jar and screw on the cap.
4. Turn it over and shake!
(Adapted from laurenconrad.com)
Photo collage letter
Difficulty level: A little hard, (but I believe in you!)
Items needed:
Wooden or cardboard letter
Mod Podge
Paintbrush
Scissors
Copies of pictures
1. Decide how you are going to arrange the pictures. You may need to cut some of them depending on the shape of the letter.
2. After you have arranged them, start gluing on the pictures by applying Mod Podge to the letter and placing the photo on top. Smooth the photos out to get rid of any air bubbles.
3. Do this for all the pictures, paying attention to placement and overlap.
4. After all photos are glued on, let them dry, and then apply a layer of Mod Podge over all of the photos.
(Adapted from houseontheway.com)ch